This recipe is the creation of my dad, and has been variously "tinkered" with by him for years.
I kept asking for the recipe, and finally one day when he was putting it together, my mom sat in the kitchen and wrote it down as he went.
Just a few notes about the ingredients: Kuner's is a mountain region brand, and I'm guessing that any brand would do if this one isn't available. An institutional can is one of those great big ones that you can get at some of the grocery stories and at Walmart, at least in our area.
Dad uses a canning kettle to cook this in, and the only warning here is, don't turn up the heat too high or you'll burn the bottom, which is not all that tasty!
So here's the recipe:
Gpa’s Chili
1 pound ground pork
5 pounds hamburger
Kuner’s Chili Beans in chili sauce 6 pound 12 ounce can (institutional size)
Kuner’s Dark Red Kidney beans 6 pound 12 ounce can (institutional size)
46 ounce can tomato juice
2 medium mild onions, chopped
2 tsp minced garlic
1 tbls salt
½ cup ketchup
3 tbls sugar
1 tbls chili powder
In 18 quart kettle, scramble cook ground pork until it begins to loose red color.
Add ground beef and onions. Cook until meat is done but not browned and onions are transparent.
Stir in remaining ingredients. Rinse cans with a little water and add to pot too.
Bring to a boil, then turn down to simmer and cook for at least 2 hours.
This freezes really well, and reheats in a jiffy either in the microwave or on the stove.
Aside from just eating this yummy stuff with shredded cheese on top and some oyster crackers, we've also used it in these ways:
mixed with left over macaroni and cheese for chili mac
rolled in a tortilla for a quickie burrito
poured over tortilla chips, topped with cheese and heated for mealtime nachos
There are probably more ideas out there, how about sharing yours?
Monday, October 30, 2006
Sunday, October 29, 2006
Halloween meals


Now aren't these some cute cats!?
Halloween has never been a really big deal for us. We occasionally went all out for the effect of a costume (these pictures from a LOOOOOONNNNNG time ago are an example), but we never were into the "scare yourself silly" mode.
Dinner on those trick or treat evenings were always something pretty easy, so here are some suggestions:
Home made chili with crackers (in the near future I'll be putting up the recipe for gpa's chili which can be made ahead and just heated up on the big night)
Hamburgers and french fries (this was a favorite of our good friend June)
Toasted cheese sandwiches
Of course on halloween there is no need for desert, there will be plenty of candy later.
Here are some safety tips for the occasion too:
* face painting is WAY safer than masks, and a lot of fun to do
* be careful of overly long costumes or costumes with trailing pieces, they require more care when walking
* always trick or treat with a buddy
* carry a flash light for safely getting down uneven sidewalks and across streets
* if there is something about a house that feels too creepy, just walk on by
* always let mom and dad check out the candy before you eat it
The best costume I remember from when I was a kid was the year my dad made us up into hobos....we wore jeans and jackets, but he somehow knew how to make the coolest beard stubble on us girls that I've ever seen.....he rubbed cold cream on our faces then pressed used coffee grounds into it.....WAY COOL DAD!!
Thursday, October 26, 2006
Gma’s Banana Nut Bread and Cream Cheese Topping
Perhaps this should be titled “When life gives you over ripe bananas, make banana bread”!
We participate in a food program called Shares, and this month’s package included bananas. Now I should clarify how we eat bananas at our house. We buy bananas in a quantity that we can eat in one day, and we like them to still be green at the stem end, so when we get a batch that looks like these, there’s only one thing to do…..
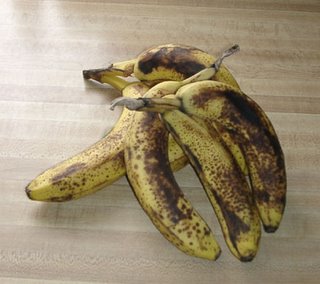
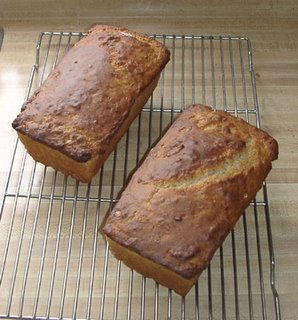
Turn them into banana bread! The batch of bananas shown was enough for a double recipe, or two loaves.
My mom used to make this when I was a kid, and I’ve yet to find a recipe that I like any better. She used to serve it for desert with the cream cheese topping – yummy! I think this would even make a good breakfast.
As always, the “healthy” alternatives are in parenthesis in the ingredient list.
Banana Nut Bread
1 cup sugar (or ½ cup sugar and ½ cup Splenda)
2 tbls shortening (canola oil works well)
1 egg (or ¼ cup egg substitute)
¾ cup milk
1 cup mashed bananas (they are ready when you can cut off the stem and squeeze the banana out like toothpaste)
3 cups flour
3 ½ tsp baking powder
1 tsp salt
¾ cup nuts, chopped (we used walnuts, these are not required)
Mix sugar, shortening and egg thoroughly. Stir in the milk and bananas until smooth.
Mix flour, baking powder and salt together and add to batter a little at a time, stirring well each time.
Fold in nuts.
Pour into greased 9x5x3 (loaf) pan and let stand for 20 minutes before baking (it will rise).
Bake at 350 degrees for 70 minutes. Turn out of pan onto rack for cooling.
Serve with cream cheese topping (recipe follows).
Cream Cheese Topping (also called “Hard Sauce”)
6 oz cream cheese
1 cup powdered sugar
5 tbls cream (or milk)
½ tsp almond extract
Beat cream cheese with electric mixer until fluffy.
Add sugar gradually, beating after each addition.
Add milk and almond and beat until smooth.
Cover and chill thoroughly.
Serve over sliced banana bread (or any other sweet bread).
I’ve never really known why mom called the topping Hard Sauce, since it’s so easy to make. Maybe just hard to keep us kids out of!
We participate in a food program called Shares, and this month’s package included bananas. Now I should clarify how we eat bananas at our house. We buy bananas in a quantity that we can eat in one day, and we like them to still be green at the stem end, so when we get a batch that looks like these, there’s only one thing to do…..

Turn them into banana bread! The batch of bananas shown was enough for a double recipe, or two loaves.

My mom used to make this when I was a kid, and I’ve yet to find a recipe that I like any better. She used to serve it for desert with the cream cheese topping – yummy! I think this would even make a good breakfast.
As always, the “healthy” alternatives are in parenthesis in the ingredient list.
Banana Nut Bread
1 cup sugar (or ½ cup sugar and ½ cup Splenda)
2 tbls shortening (canola oil works well)
1 egg (or ¼ cup egg substitute)
¾ cup milk
1 cup mashed bananas (they are ready when you can cut off the stem and squeeze the banana out like toothpaste)
3 cups flour
3 ½ tsp baking powder
1 tsp salt
¾ cup nuts, chopped (we used walnuts, these are not required)
Mix sugar, shortening and egg thoroughly. Stir in the milk and bananas until smooth.
Mix flour, baking powder and salt together and add to batter a little at a time, stirring well each time.
Fold in nuts.
Pour into greased 9x5x3 (loaf) pan and let stand for 20 minutes before baking (it will rise).
Bake at 350 degrees for 70 minutes. Turn out of pan onto rack for cooling.
Serve with cream cheese topping (recipe follows).
Cream Cheese Topping (also called “Hard Sauce”)
6 oz cream cheese
1 cup powdered sugar
5 tbls cream (or milk)
½ tsp almond extract
Beat cream cheese with electric mixer until fluffy.
Add sugar gradually, beating after each addition.
Add milk and almond and beat until smooth.
Cover and chill thoroughly.
Serve over sliced banana bread (or any other sweet bread).
I’ve never really known why mom called the topping Hard Sauce, since it’s so easy to make. Maybe just hard to keep us kids out of!
Friday, October 13, 2006
Mom's Waffles

I like waffles, but don't bring me any of those things that come out of the freezer at the grocery store and go into the toaster, and I don't want any limp weak sister variety either!
So the most important thing about getting good waffles is getting a good waffle iron, and to me that means one that is HEAVY and gets really HOT!
I've owned several waffle irons over the years, and the best one was the used one my mother gave me. Unfortunately, these things don't last forever, and I've had a couple of mediocre ones since. The latest one is pretty good.
This waffle recipe has been developed by years of taste testing in our family kitchen. This was always a weekend breakfast because during the week (when my husband and I had to be at work by 7:30 am) there just wasn't time. Besides, waffles deserve the luxury of the extra time.
I have given here the full size recipe which makes 5 full sized waffles. Because for us that would mean at least one left over, and the dog really doesn't need them, I have included in parentheses the measurements for a half batch. I have also included the alternate "healthy" ingredients, but you just can not do these without real eggs.
Mom's Waffles
3 (2) eggs, separated
1 1/2 (3/4) cup milk (2% works fine)
1 (1/2) tsp vanilla
3 (1 1/2) tsp sugar (1 tsp of Splenda)
4 (2) tbls melted butter (canola oil works great)
1 3/4 (7/8) cup flour
2 (1) tsp baking powder
1/2 (1/4) tsp salt
Plug in the waffle iron to preheat.
In one dish (I use a 4 cup glass measuring cup), mix flour, baking powder and salt to combine.
In a second dish, whisk together milk, vanilla, sugar, butter and the egg yolks.
Beat egg whites to firm peaks (I use a hand mixer).
Using the mixer, beat the liquid ingredients into the dry ones until well combined. Use a spatula to fold the egg whites into the batter.
I spray the waffle iron with a non-stick cooking spray before I cook the first one, and usually that one gets fed to the dog because I didn't let the iron get hot enough or it sticks. Its just part of the waffle tradition!
We eat these at breakfast and use real maple syrup (it costs more, but we use less because it actually tastes like something!).
I remember as a child eating waffles for dinner with creamed tuna or chipped beef over them. If you want to have a go at that, leave out the sugar and the vanilla.
Enjoy the crunch!
Wednesday, October 11, 2006
Nick’s Healthy Oatmeal Muffins
Since we seem to have begun with breakfast foods, I thought I’d share the recipe that my husband has developed for some really tasty oatmeal muffins.
We have some very interesting food challenges at our house, trying to cook to cut sugar and cholesterol, so this recipe has been variously “tweaked” to make it much healthier than the original was.
The result is a really great tasting breakfast treat that you can eat without guilt! Just to give you all the possibilities, I have included the “straight” recipe and the “healthy” alternatives.
Healthy Oatmeal Muffins
1 egg or ¼ cup egg substitute
½ cup brown sugar or date sugar
1 cup rolled oats (NOT instant)
1 cup buttermilk
½ teaspoon vanilla
1 cup flour
½ teaspoon baking soda
½ teaspoon salt
1 ½ teaspoons baking powder
1 teaspoon cinnamon
½ cup vegetable oil or ½ cup unsweetened applesauce
1 cup dried fruit (blueberries, cranberries, raisins)
½ cup chopped nuts (pecans, walnuts)
Preheat the oven to 400 degrees. Prepare 12 muffin cups by spraying with non-stick cooking spray.
Beat egg, buttermilk and vanilla, add sugar and oats and let stand to soak.
Combine flour, soda, salt, baking powder and cinnamon to mix well. Add dry ingredients to oatmeal mixture and stir to moisten.
Fold in fruit and nuts.
Spoon batter into muffin tin, bake 12 to 14 minutes (depending on your oven this may take as long as 20 minutes).
Our favorite combination is dried blueberries and pecans, so we'd love to hear what your favorite combo is!
Monday, October 09, 2006
Pappy's Puff Pancakes
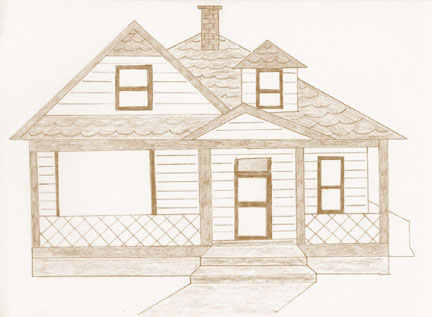
Hattie’s Kitchen is an imaginary place inside this house.
The basis of this drawing was a photograph which my mother took in the late 1940s. She was born and raised in Springfield, Missouri, and the photo was of the last house they lived in there.
The influences of my family’s southern cooking and having lived in California, Utah and Colorado has had an impact on what are favorite recipes at our house, but this imagined safe place was the beginning of the cookbook.

As I write this, it is Sunday morning, and I’m thinking about the Sunday’s of my childhood.
I spent a lot of weekends with my maternal grandparents. For some reason that I can’t even remember, we called them Mammy and Pappy. They were the source of a lot of my learning about the skills that are being lost today.
This skillet belonged to them, and came to me after my grandmother had a stroke and they went to live with my aunt in Tennessee.
Sunday morning, while Mammy got my sister and me ready for church, Pappy made breakfast. It is the only meal I remember him ever cooking, so having his recipe for this signature meal is pretty amazing. That this copy is actually in his handwriting is an even more special treasure.
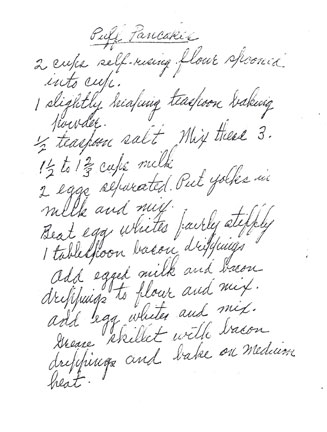
Pappy’s Puff Pancakes
2 cups self-rising flour – spooned into cup
1 slightly heaping teaspoon baking powder
½ teaspoon salt
1 ½ to 1 2/3 cups milk
2 eggs, separated
1 tablespoon bacon drippings
Mix together the flour, baking powder and salt in bowl.
Mix the milk, egg yolks and bacon drippings, add to dry ingredients and mix
Beat egg whites fairly stiffly and mix into the batter
Grease skillet with bacon drippings and bake pancakes on medium heat
Now I know these are probably not “heart healthy”, but I do remember the Sunday ritual, and I’m convinced that even today having these once in a while wouldn’t hurt you too much.
I can remember the sound of the rotary egg beater as the egg whites were whipped, and the delightful crunch of the outside browned edge of these wonderful tasting breakfast treats.
I’m sure they wouldn’t taste the same with any other kind of oil added, so be brave and fry some bacon ahead of time to use those drippings. After all, you won’t need to add any butter to them once they are cooked. Since no one else has “The Skillet” you’ll need to make do with your own heavy pan--try to stay away from Teflon though, the texture won’t be the same.
So I’m hoping someone will give these a try and let me know what you think!
Friday, October 06, 2006
Welcome to Hattie's Kitchen!
Just when it seemed I had enough projects going on, this one has returned, and just won't leave me alone, so I'm going to try it in this format for now at least.
The idea for Hattie's Kitchen has been floating around for several years at our house, and now that my daughter will be getting married soon, I have a little extra "boost" to get it going.
I have acquired over the years a lot of recipes from family members, and the original idea was to put them together in a notebook or something similar to keep them organized. After thinking about that for a while, I felt that there should be something more to it than just the recipes. After all, I'm sure that some of them will be very similar to recipes that are available from other sources, but what is important about these is the story behind each one: who did each come from? how did it come to be a favorite?
So each recipe will be accompanied by a bit of a story about where it came from and when it was added to the recipe box.
You as readers are invited to try these out and give me some feedback. If you have any favorite recipes that you have stories to go with, I invite you to share them as well.
So now its time to tie on our aprons and head to the kitchen, please join me!
Subscribe to:
Posts (Atom)